How to publish a package on NPM
Oct 8, 2022

I had the idea of creating a forms component library in react native with the support of multiple ready-to-use form components that could be customizable. While I was working on the project I decided to upload it as a package to NPM for others to use so henceforth this memoir. 👨🏻💻
Here's what we need to do ⬇
Setup and push all the code to a GitHub repository ⚒
Create an account on NPM and link to the GitHub repository 👷🏻♂️
Install and setup semantic release 👨🏻🏭
Setup automation using GitHub Actions 👨🏻🔧
Push and see the magic! 🎉
Setup and push all the code to a GitHub repository ⚒
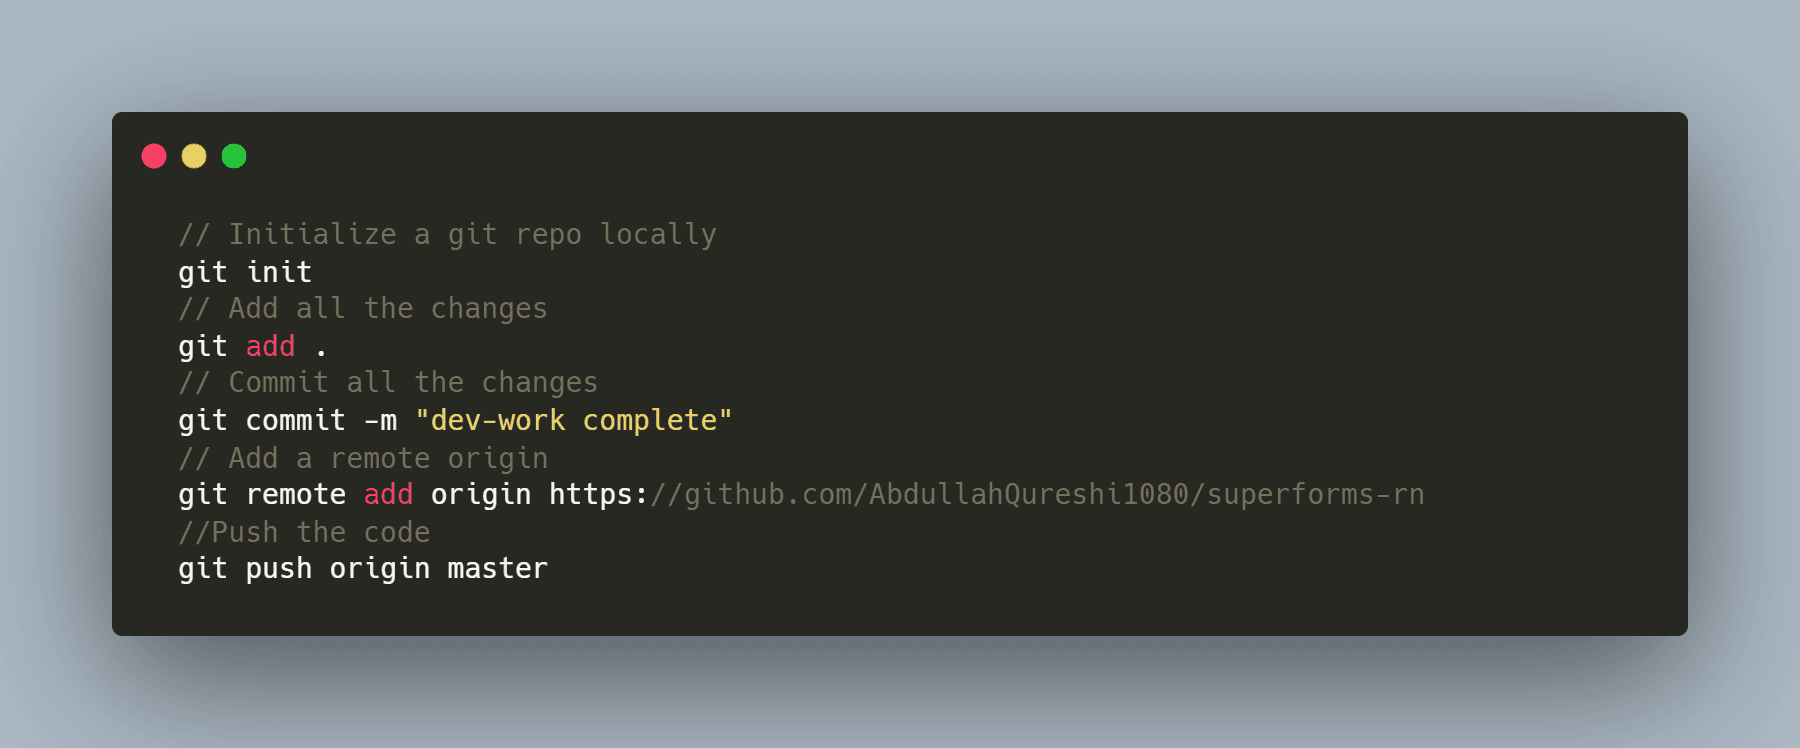
You might have done this a gazillion times now, but for those of you who might be new, we have to set up a git repository for our local code and push it to a cloud repository in our case GitHub.
Create an account on NPM and link to the GitHub repository 👷🏻♂️
Go to the NPM website and click on the "Sign up" button located in the top right corner of the page.
Fill in your details in the registration form and click the "Sign up" button.
Check your email and click on the verification link sent by NPM to verify your account.
Once you have verified your account, log in to NPM using your credentials.
Open your GitHub repository and copy the URL from the address bar.
In your NPM account, click on the "Create a new package" button and enter your package details.
In the "Repository" field, paste the URL of your GitHub repository.
Save your package details and publish your package to NPM by running the "npm publish" command in your terminal.
Your package is now published on NPM and linked to your GitHub repository. Anyone can now install your package using the "npm install" command.
While you can complete steps 7 & 8 at this moment but I would do it once we have set up semantic release.
Install and setup semantic release 👨🏻🏭
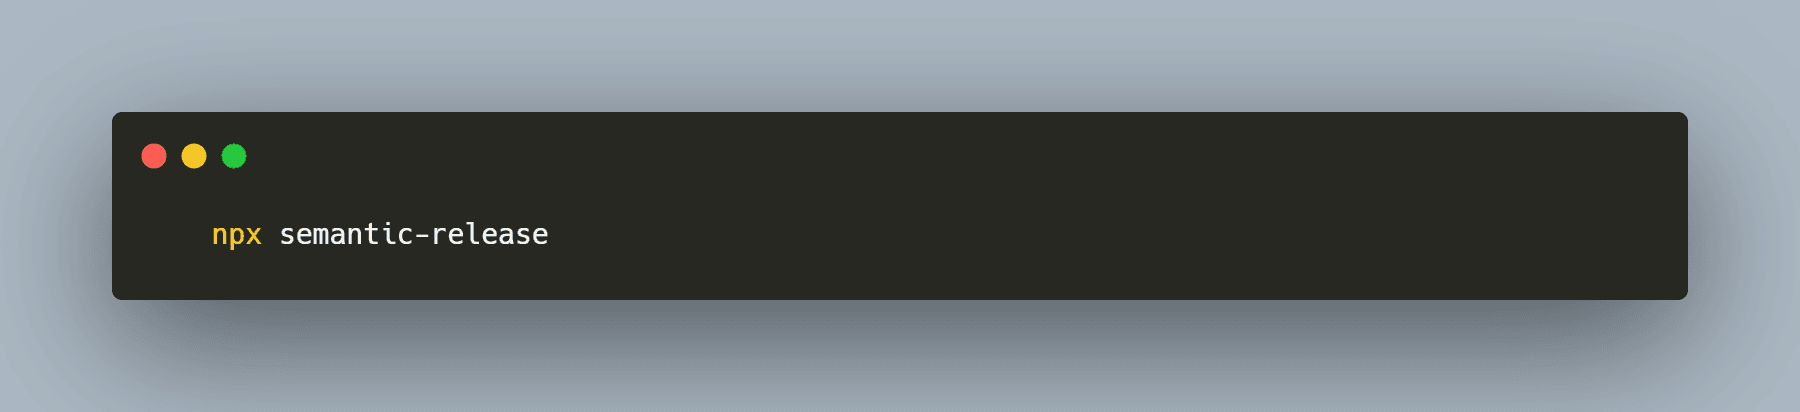
I used npx to install and set up semantic-release, this gave me options as to how I wanted it to be set it up.
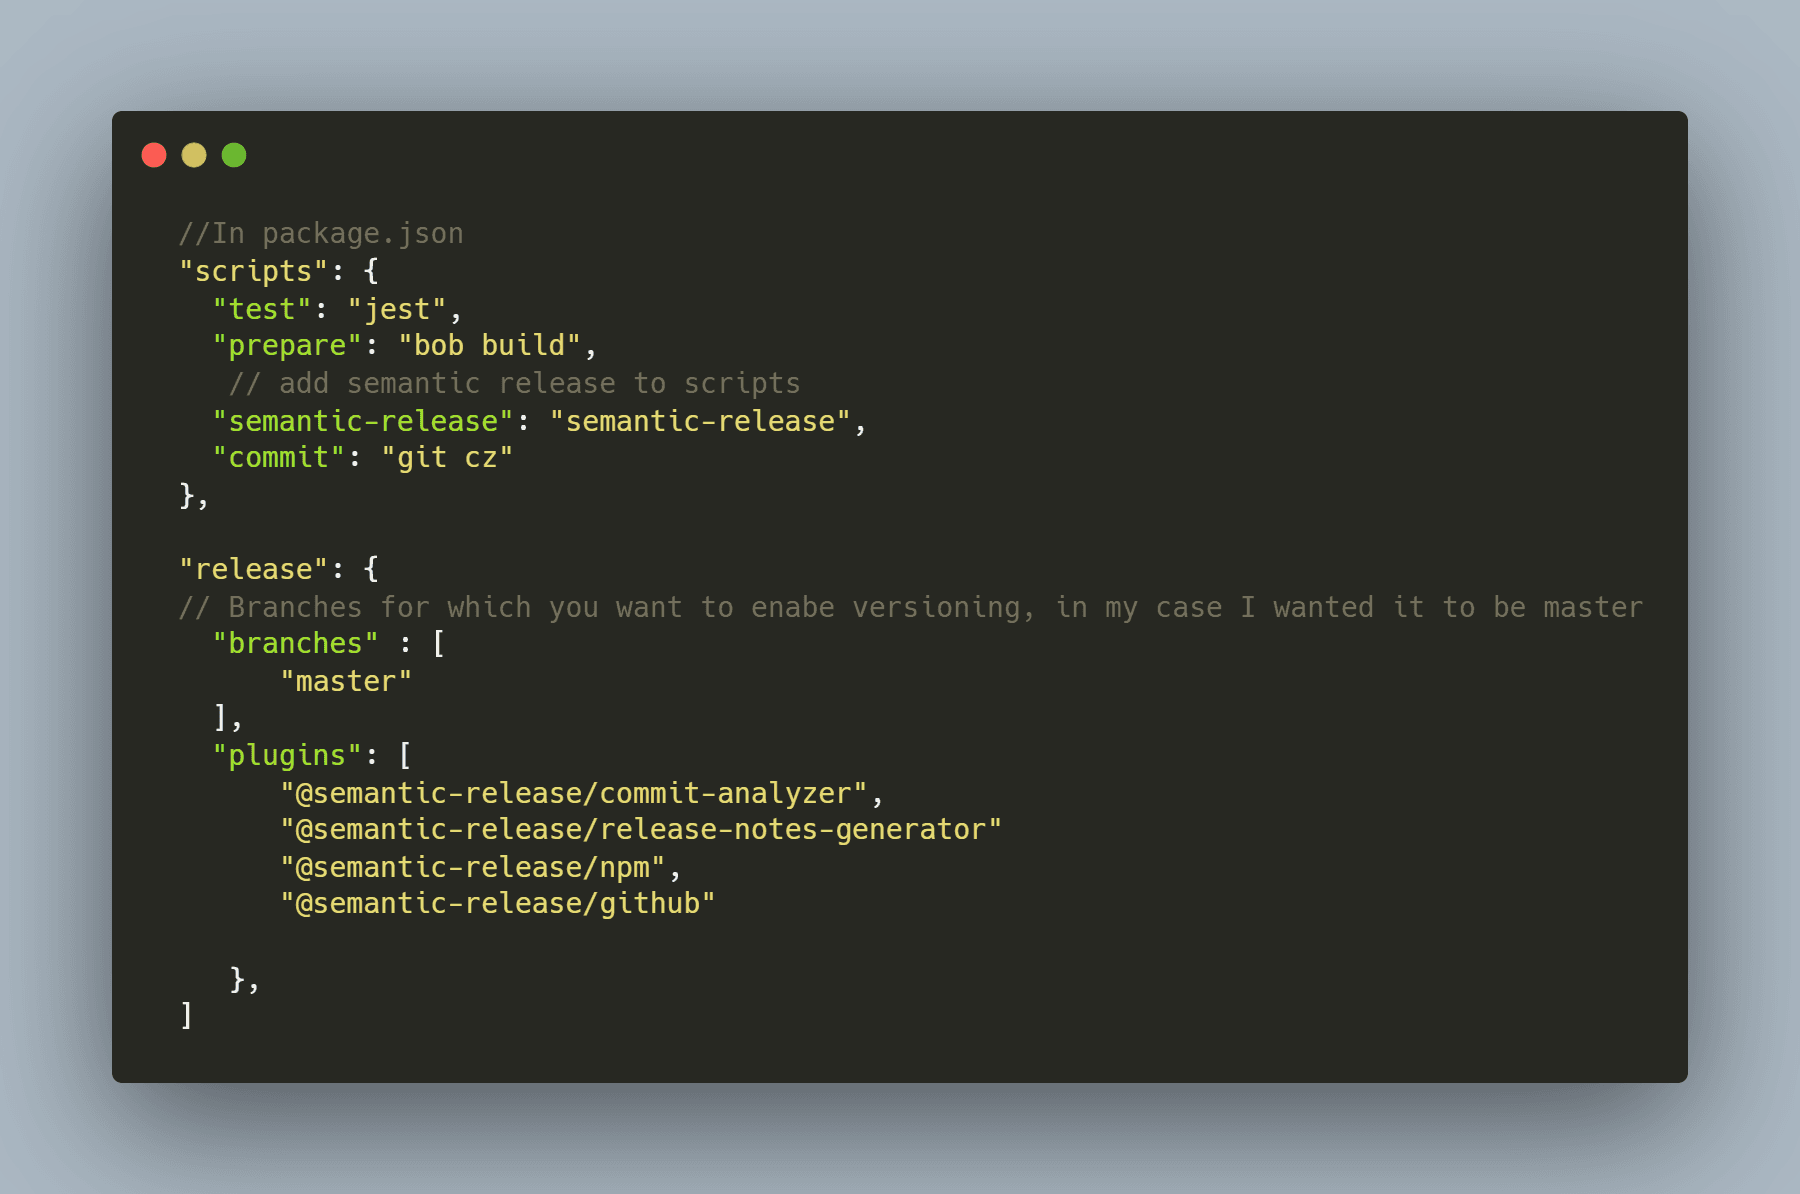
After the npx installs semantic-release, we have to make some changes to our package.json file as below
Setup automation using GitHub Actions 👨🏻🔧
Create a GitHub access token:We need a personal access token on GitHub that has permission to create releases. You can create a token in your GitHub account settings under the "Developer settings" -> "Personal access tokens" section.
Add GitHub access token as a secret:
In your GitHub repository, navigate to the "Settings" -> "Secrets" section and add a new secret called
GITHUB_TOKENwith the value set to the personal access token, you created in the previous step.Create NPM access token as a secret:
First, we need to generate an npm token that will be used to authenticate our npm packages. We can do this by logging into our npm account and generating a new token with the appropriate permissions. Make sure to copy the token as it will not be visible again. Next, we need to add the npm token as a secret in our GitHub repository.
Add NPM access token as a secret:
Navigate to the repository and click on "Settings" in the top right corner. Then, click on "Secrets" in the left-hand menu and then "New secret" in the top right corner. Add the token key
NPM_TOKENand paste the token you generated earlier.
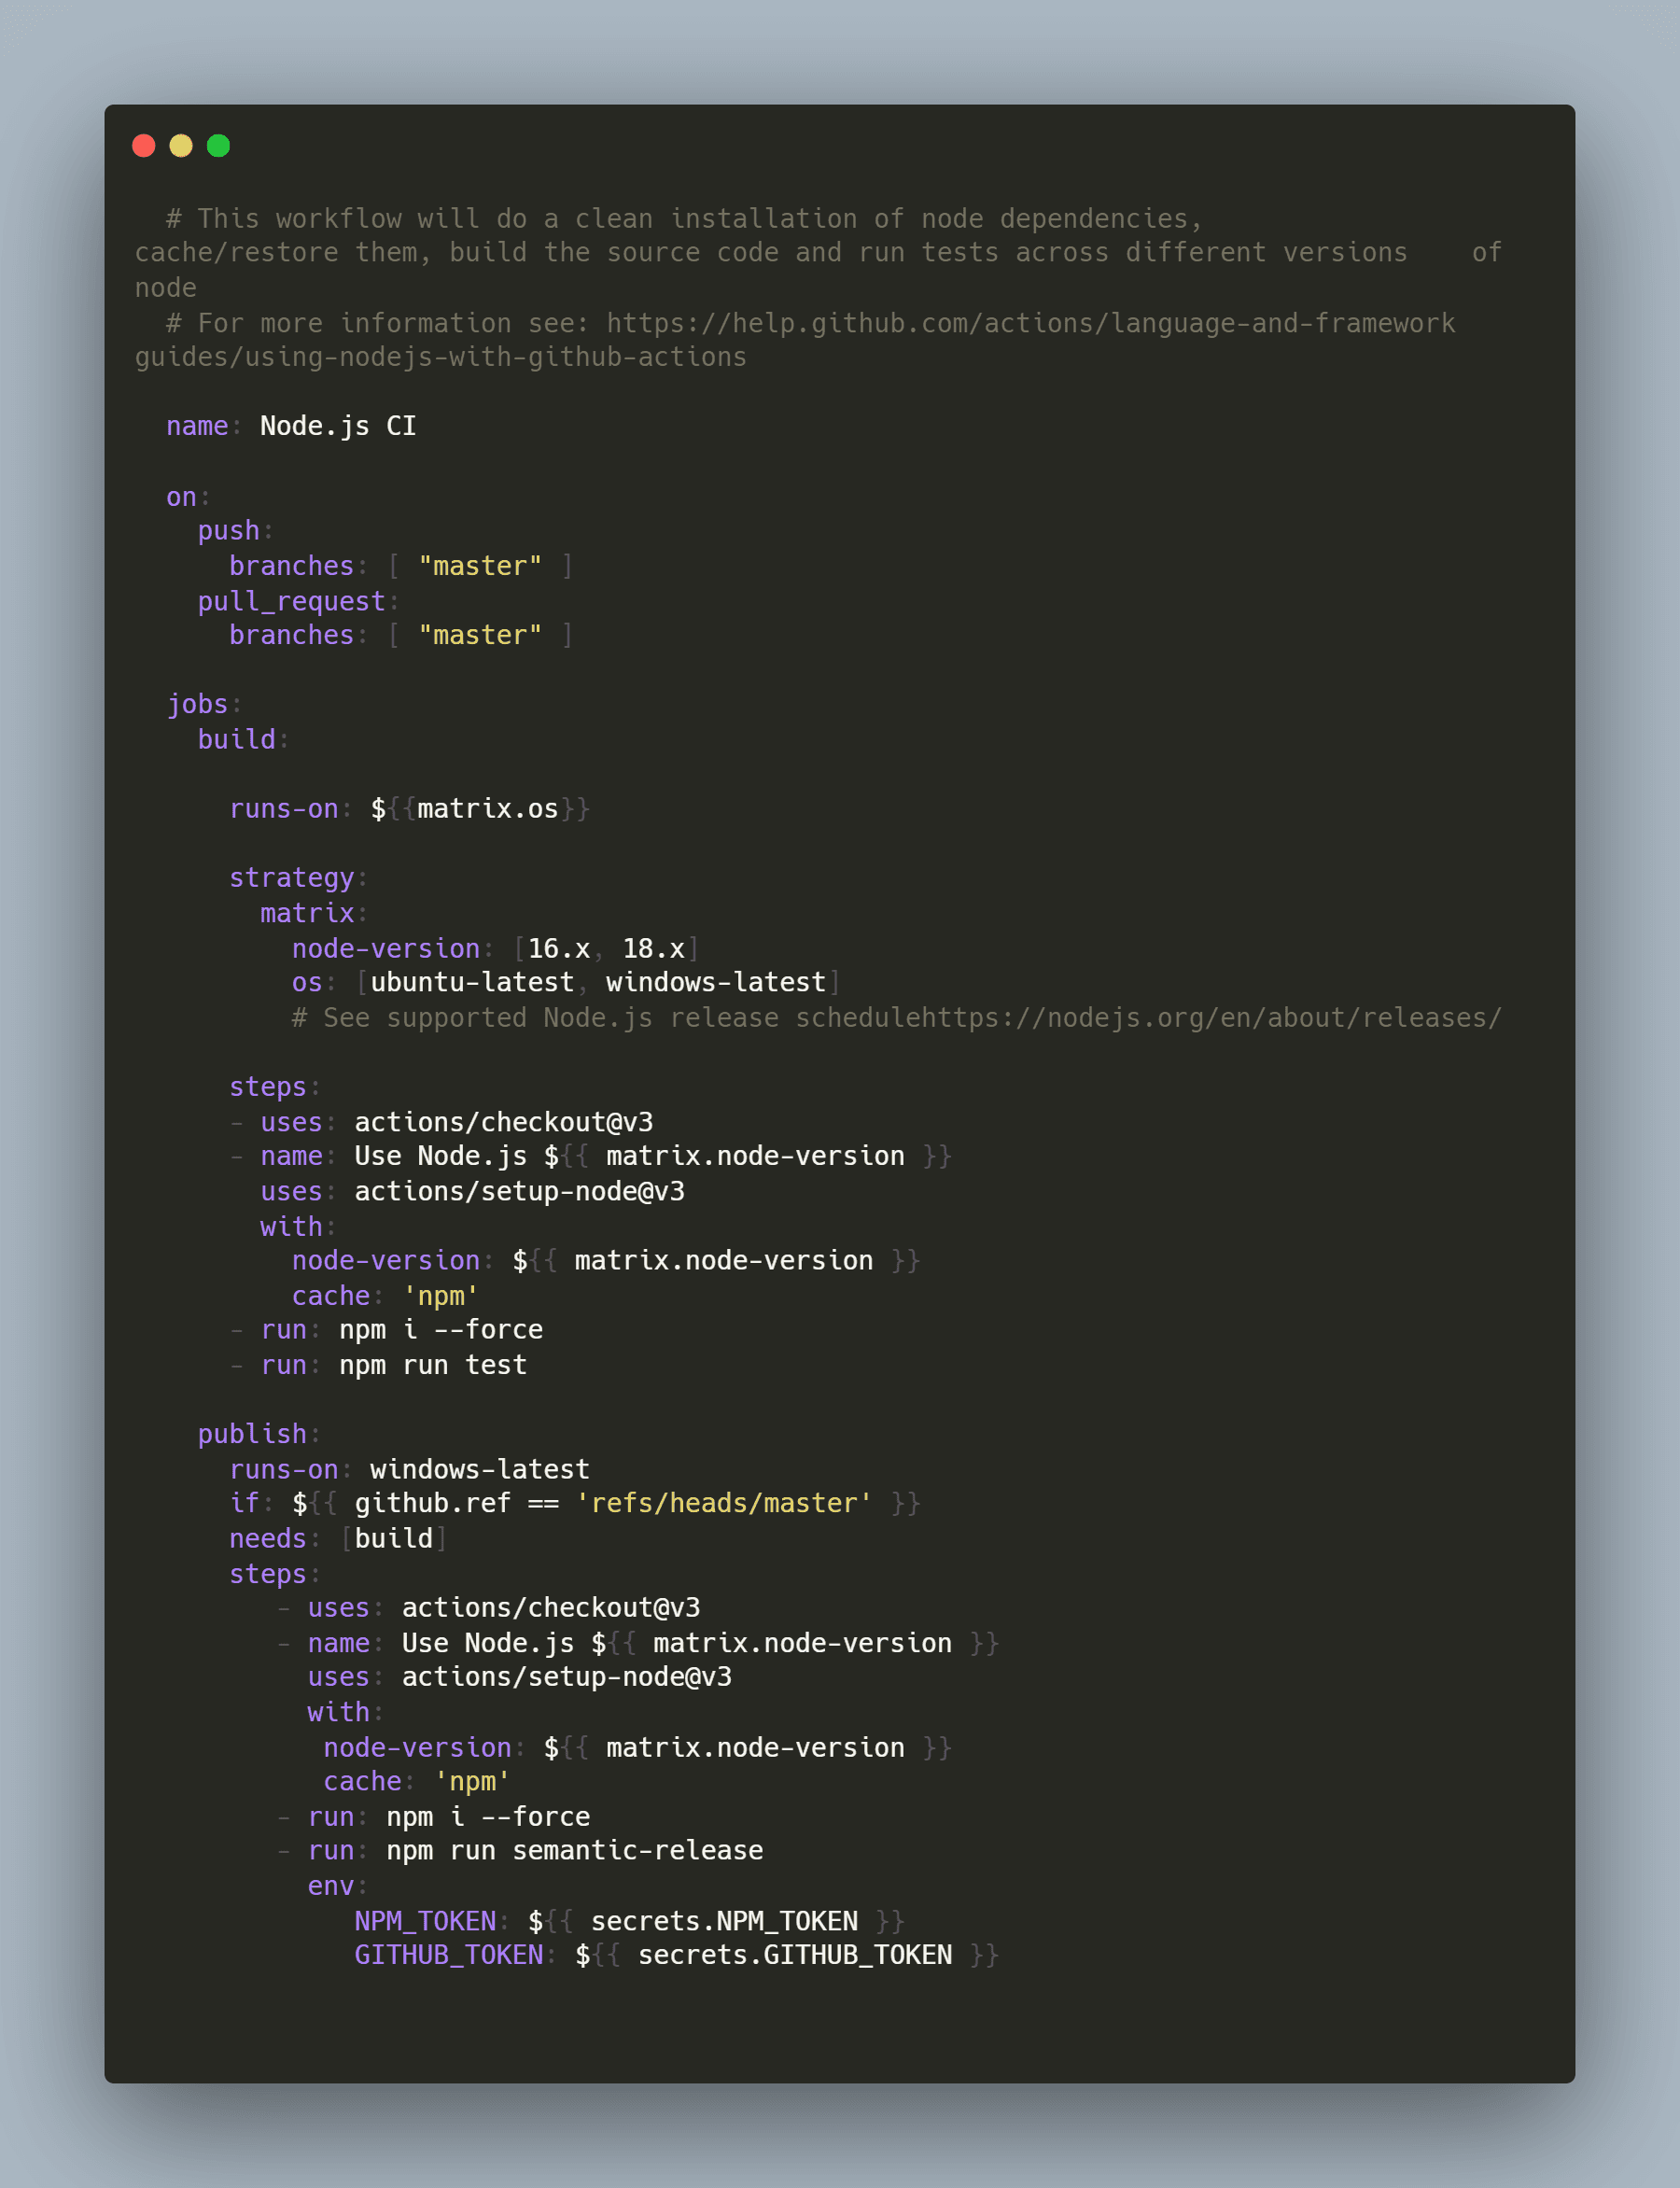
Create a .yaml file for release actionIn your repository create a publish.yml file in the .github/workflows/ folder with the following content.
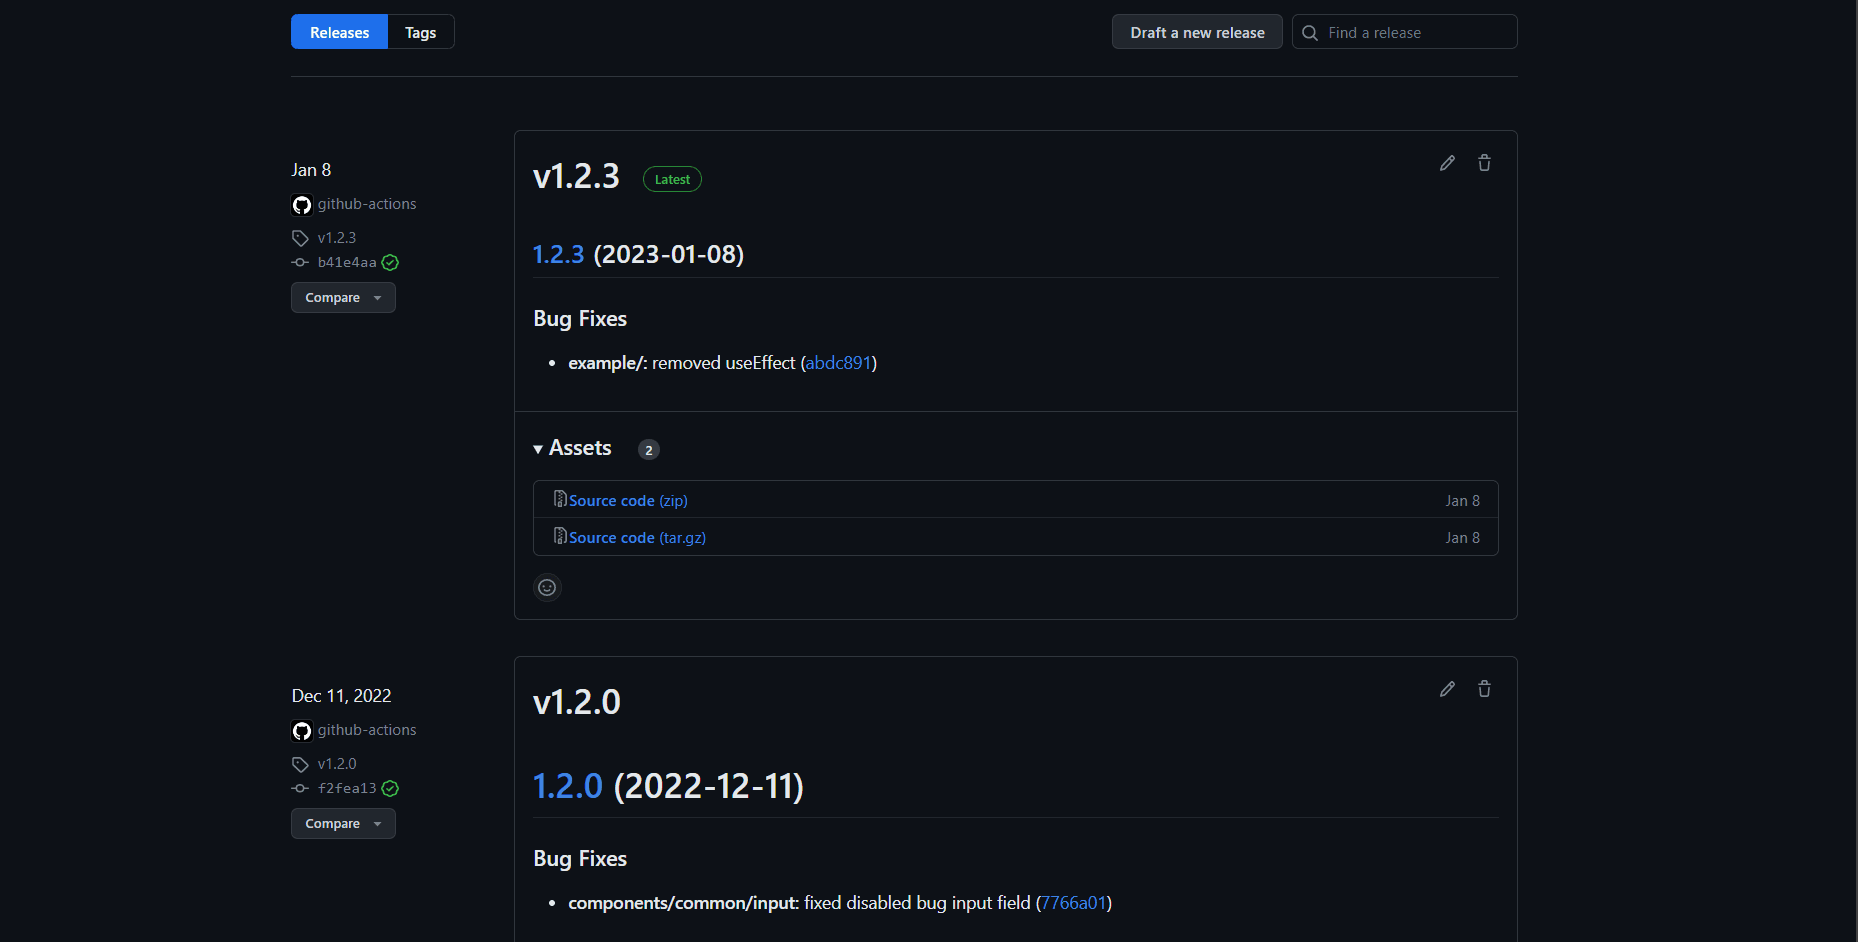
Push and see the magic! 🎉
If steps 1 - 4 have been done successfully then all is set. Now we just have to make some changes, push to our master branch and see the magic of semantic release & GitHub Actions. You will now see your release with semantic versioning.